January 25, 2018 9:27 am
In this post, the fourth of our blog posts for the first release of the year, we will explore how to use operating thresholds from the BigML API. So far we have learned about what operating thresholds are, seen a concrete example of how they can be useful, and gone step by step on how to change them through the BigML Dashboard. Now we will discuss how to adjust them programmatically using our REST API.
Changing operating thresholds can be useful for classification problems, regardless of the underlying model. For this post, we will assume you want to model with a boosted tree, but these general steps apply no matter which algorithm you want to use.
For longtime readers, you will notice that this post is similar to the corresponding API tutorial post from our winter 2017 release about using Boosted Trees with the API. This is because the process is exactly the same until prediction time. At that step, we pass an additional argument which changes the operating threshold.
In order to use the API, you will have to set up some environment variables. You should set BIGML_USERNAME, BIGML_API_KEY and BIGML_AUTH in your .bash_profile. BIGML_USERNAME is just your username. Your BIGML_API_KEY can be found at the Dashboard by clicking on your username to pull up the account page, and then clicking on ‘API Key’. BIGML_AUTH is set as a combination of the two.
export BIGML_USERNAME=my_name
export BIGML_API_KEY=123456789
export BIGML_AUTH="username=$BIGML_USERNAME;api_key=$BIGML_API_KEY;"
Just as with the BigML Dashboard, your first step is uploading some data to be processed. You can point to a remote source, or upload directly from your computer in a variety of common file formats.
To do this, you can use the terminal with curl, or any other command-line tool that takes https methods. In this example, we are uploading the local file ‘churn.csv’.
curl "https://bigml.io/source?$BIGML_AUTH" \
  -F file=@churn.csv
A BigML dataset resource is a serialized form of your data, with some simple statistics already calculated and ready to be processed by Machine Learning algorithms. To create a dataset from your uploaded data, use:
curl "https://bigml.io/dataset?$BIGML_AUTH" \
   -X POST \
   -H 'content-type: application/json' \
   -d '{"source": "source/5a67736a28e1f41e22000657"}'
In order to later create a meaningful evaluation, we will have to split this dataset into two parts: a training dataset to create the model, and a test dataset to evaluate how the model is doing. We will need two more commands:
curl "https://bigml.io/dataset?$BIGML_AUTH" \
   -X POST \
   -H 'content-type: application/json' \
   -d '{"origin_dataset" : "dataset/5a67745828e1f41e2200065b", \
        "sample_rate" : 0.8, "seed":"example"}'
curl "https://bigml.io/dataset?$BIGML_AUTH" \
   -X POST \
   -H 'content-type: application/json' \
   -d '{"origin_dataset": "dataset/5a67745828e1f41e2200065b", \
        "sample_rate": 0.8, “out_of_bag”: true, "seed": "example"}'
This is similar to how we created our dataset, with some key differences. First, since we are creating these datasets from another dataset, we need to use “origin_dataset”. We are sampling at a rate of 80% for the first training dataset, and then setting “out_of_bag” to true to get the remaining 20% for the second test dataset. The seed is arbitrary, but we need to use the same one for each dataset.
Use the training dataset to make your classification model. Here, we create a boosted ensemble by including ‘ensemble?’ in the URL and passing the “boosting” argument.
curl "https://bigml.io/ensemble?$BIGML_AUTH" \
   -X POST \
   -H 'content-type: application/json' \
   -d '{"dataset": "dataset/5a6774d928e1f41e2200065e", "boosting": {}}'
To see how well your model is performing, you will need to evaluate it against the test dataset. For classification models, the result of an evaluation will include measures of accuracy, average_f_measure, average_phi, average_precision, average_recall, and a confusion_matrix for the model.
curl "https://bigml.io/evaluation?$BIGML_AUTH" \
   -X POST \
   -H 'content-type: application/json' \
   -d '{"dataset": "dataset/5a67767528e1f41e22000664", \
        "ensemble": "ensemble/5a67781228e1f4195e002169"}'
Once you have made an evaluation, you can view it in the Dashboard. As discussed in the previous blog post, you can adjust the threshold slider to see how your evaluation is affected and choose the best threshold level for your problem.
At this point, the operating threshold finally comes into play. To create a prediction with a different operating threshold, you will pass it an operating_point map. This will contain three key-value pairs, the kind, the positive_class, and the threshold.
For example, suppose you want to predict the churn if the value of field 3 is “123-4567” and the value of field 9 is 35.0. You would use the call:
curl "https://bigml.io/prediction?$BIGML_AUTH" \
   -X POST \
   -H 'content-type: application/json' \
   -d '{"ensemble": "ensemble/5a67781228e1f4195e002169", \
        "input_data": {"000003": "123-4567", "000009": 35.0}}'
This returns a prediction object where the prediction is “false” and the “probabilities” are [[“False”, 0.91164], [“True”, 0.08836]]. That is, the probability of being false is 91.1% and the probability of being true is 8.84%.
Suppose we set the operating threshold of “True” to 5%. Then we use the argument “operating_point”: {“kind”: “probability” , “positive_class”: “True”, “threshold”: 0.05}.
curl "https://bigml.io/prediction?$BIGML_AUTH" \
   -X POST \
   -H 'content-type: application/json' \
   -d '{"ensemble": "ensemble/5a67781228e1f4195e002169", \
        "input_data": {"000003": "123-4567", "000009": 35.0}, \
        "operating_point": {"kind": "probability", \
                            "positive_class": "True", \
                            "threshold": 0.05}}'
Now the prediction is “true”, because our threshold level (0.05) is less than the probability of being true (0.088).
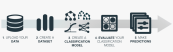
We have seen the five steps to change the operating threshold using the BigML API. We create a source, dataset, and model using the usual Machine Learning workflow, and can create an evaluation to measure the quality of our model. The operating threshold is set at prediction time, and we can pass the necessary argument to change it as we wish.
If you have any questions or you’d like to learn more about how operating thresholds work, please visit the dedicated release page. It includes a series of six blog posts about operating thresholds, the BigML Dashboard and API documentation, the webinar slideshow as well as the full webinar recording.
Posted by akashenfelter
Categories: Operating Thresholds, Release, Tutorial, Webinar
Tags: API, classification problems, deepnet, Ensemble, logistic regression, model, Operating Thresholds, programmatically, Rest API, threshold
Mobile Site | Full Site
Get a free blog at WordPress.com Theme: WordPress Mobile Edition by Alex King.
[…] be three more blog posts focused on how to use operating thresholds through the BigML Dashboard, API, and WhizzML and Python Bindings for automation, and finally we will complete this series of 6 […]
By Introduction to Operating Thresholds | The Official Blog of BigML.com on January 29, 2018 at 9:22 am